READING & WRITING

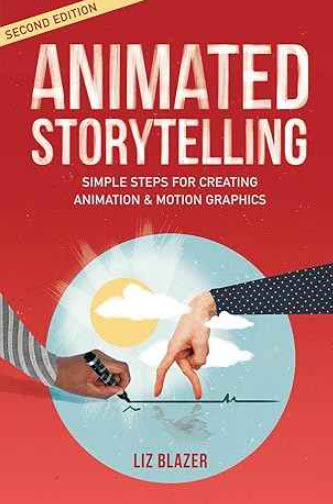
Summary of Chapter Ten Animated Storytelling by Liz Blazer
Chapter 10 of Liz Blazer’s animation book, Animate! Big-picture thinking, frame by frame, is especially useful and practical as she responsibly and ably guides us towards some final, sage advice!
Although we have upped our storyboard, color scripts, and soundtrack game, Ms. Blazer essentially warns us that final animating still can be a tricky, dynamic process where, “all hell can break loose”.
Key, overall points from Chapter 10 are appreciating and learning and the labor-intensive work and techniques to make emotionally impactful animations *frame-by frame*! . . . .
This knowing that *The big picture emerges from the time that it takes to create these meticulously crafted frames!*.
Understand, however, that even though each frame should be its own special entity that there is something still missing —- A skilled animator who *understands the creatively and techniques with which to balance each frame with overall movement!!* . . . . With that missing piece characters, elements, and scenes come fully into a grand being!
Continued Spoiler Alert – Below are key, selected chapter learnings & insights from chapter 9, Technique. Below also contains what was not so applicable or clear to me (if anything) at this stage of my animation and motion graphics journey.
Key, Selected Chapter 10 Learnings & Insights
● Especially if you are interested in the business of animation, create a production schedule – It may seem like common sense but, even with smaller projects, I reminded myself to step back and better plan my projects, if only mentally.
I would say, particularly regarding larger projects Ms. Blazer usefully admonishes that the best way to create a production calendar is to [create] a blank calendar and then fill it in backwards — from the final delivery date, and then back through post-production, production, and pre-production.
● Protect Ya’ Tech – Backup your digital files!; use simple, logical, and organized filenames and schemes! *Easy to overlook* – not invest in — until you get burned . . . . a time or two!
● Start easy, gain confidence! – Animate your project’s low hanging fruit FIRST!
● Break up tough, challenging scenes into smaller pieces and, because even a 3 second animation can take several hours (if not a whole day) . . .“*plan very well* so that no animation is cut!”.
● Pose your shots before animating and Mix it Up ! – Mix up shot length, timing etc. . . . “super clean” can lack focus and seem flat. To add depth and physicality consider adding grain (*look it up!*), grunge (*look it up*!), or vignette.
● Sound – Understand the importance of sound and music but don’t exploit at the expense of the animation, which can be easy to do! Be flexible with sound. – Consistently do two things as you create and at the end of your animation –
1) Listen to sound while animating to hit sound marks.
2) Mute, turn all sound off, to check your movements.
RESEARCH TO INFORM

This week we were challenged to search and find 5-10 examples of user animations that are inspiring, useful, and/or creative. Kinda got into it and, when I came up for air, I realized that I had just about maxed out my target example quota!
As you will see, some of my examples are “bad” in that they suggest what may be wrong with user interfaces: I think that bad interfaces can definitely be useful and instructive — even though some might curse, or simply leave them (if possible) in the immediacy of the moment!
Speaking of cursing, I also broadened my User Interface (UI) example parameters to include some traditionally static items, including “the UI of bad signage”, which, too often, has been the confusing *bane*of my existence for many years!
I took a quick road trip into D.C. and snapped a few pics! It wasn’t hard to find pics of signage that awkward and confusing . . . at best!
Thank goodness for the popular community-based, turn by-turn GPS app called Waze! . . . .
Now Wait! ……… Now why do I like Waze’s UI/ functionality?!! ====> At a high-level, and simply put Waze usually enhances my driving experience without getting in the way!
USEFUL, INSPIRING, OR CREATIVE USER INTERFACE EXAMPLE – # 1 “No Video? – Not Quite!”
CATEGORY: “USEFUL UI IMPROVEMENT— COULD BE BETTER —- WHAT CAN WE LEARN?”

The black and white “no video” icon interface above was the first thing that I encountered on my *cell phone* as I tried to watch this week’s recorded “studio time” video on UI.
Importantly this “studio time” is where we students get a chance to review the assignment, ask professor Golden questions, and have a chance to benefit from group interaction.
Guess what? . . . On my *cell phone*, where of course a lot of UI activity, and learning, and other interactions takes place I understandably interpreted the black and white icon below as an error message!
I waited patiently, but unsuccessfully, for the session to start – just in case I had a bad internet connection or something! . . . I then started clicking around *impatiently* at the icon to try to get the session to play! What am I missing? I thought!
I left!! …………… I simply *abandoned* the situation perhaps like Professor’s mom might have!
If this had been a product or service for sale the company would have likely lost the opportunity for a sale!
Only when I got back to desktop version of Blackboard I realized and saw that there was actually a small progress bar that I needed to press to get beyond the initial “no video” message that was being clearly messaged to me!
Learning UI Moral of the Story?: You guessed it: Ideally the misleading black and white “no video” icon should have somehow been *eliminated* such that the video is actually ready to play when the user hits like a *prominently displayed* play button icon (like You Tube Videos for example) — which was essentially missing in this case!
USEFUL, INSPIRING, OR CREATIVE USER INTERFACE EXAMPLE – # 2 “*Uneventful* Parking UI –That’s the way I Like it – Aha Aha ”
CATEGORY: “VERY DECENT UI – YOU CAN STILL BE GOOD . . . NOTICING YOU IS *NOT* A REQUIREMENT!”
Mostly boomers or a generation or two after may have heard of KC & The Sunshine Band’s, twice chart topping hit out the mid 70’s That’s the Way (Aha Aha) I Like it (Aha Aha). This song encapsulates what I generally like about UI’s. This, whether they be of the static or non-static variety — I like it when they stay out of the way and only purposefully enhance my user experience!
I must admit that when I first gleaned over this week’s assignment, as an “old schooler” I did not intuitively understand or pay much attention to UI’s that actually involve motion. Honestly I generally don’t necessarily like UI motion if I perceive it to be motion for motion sake. Now that I deliberately researched and saw some “fun”, cool, UI examples – I surely get them but see them mainly being useful in selected situations. How do you spell judicious? This, unless I, personally have found and learned a useful way to show my UI motion off (lol).
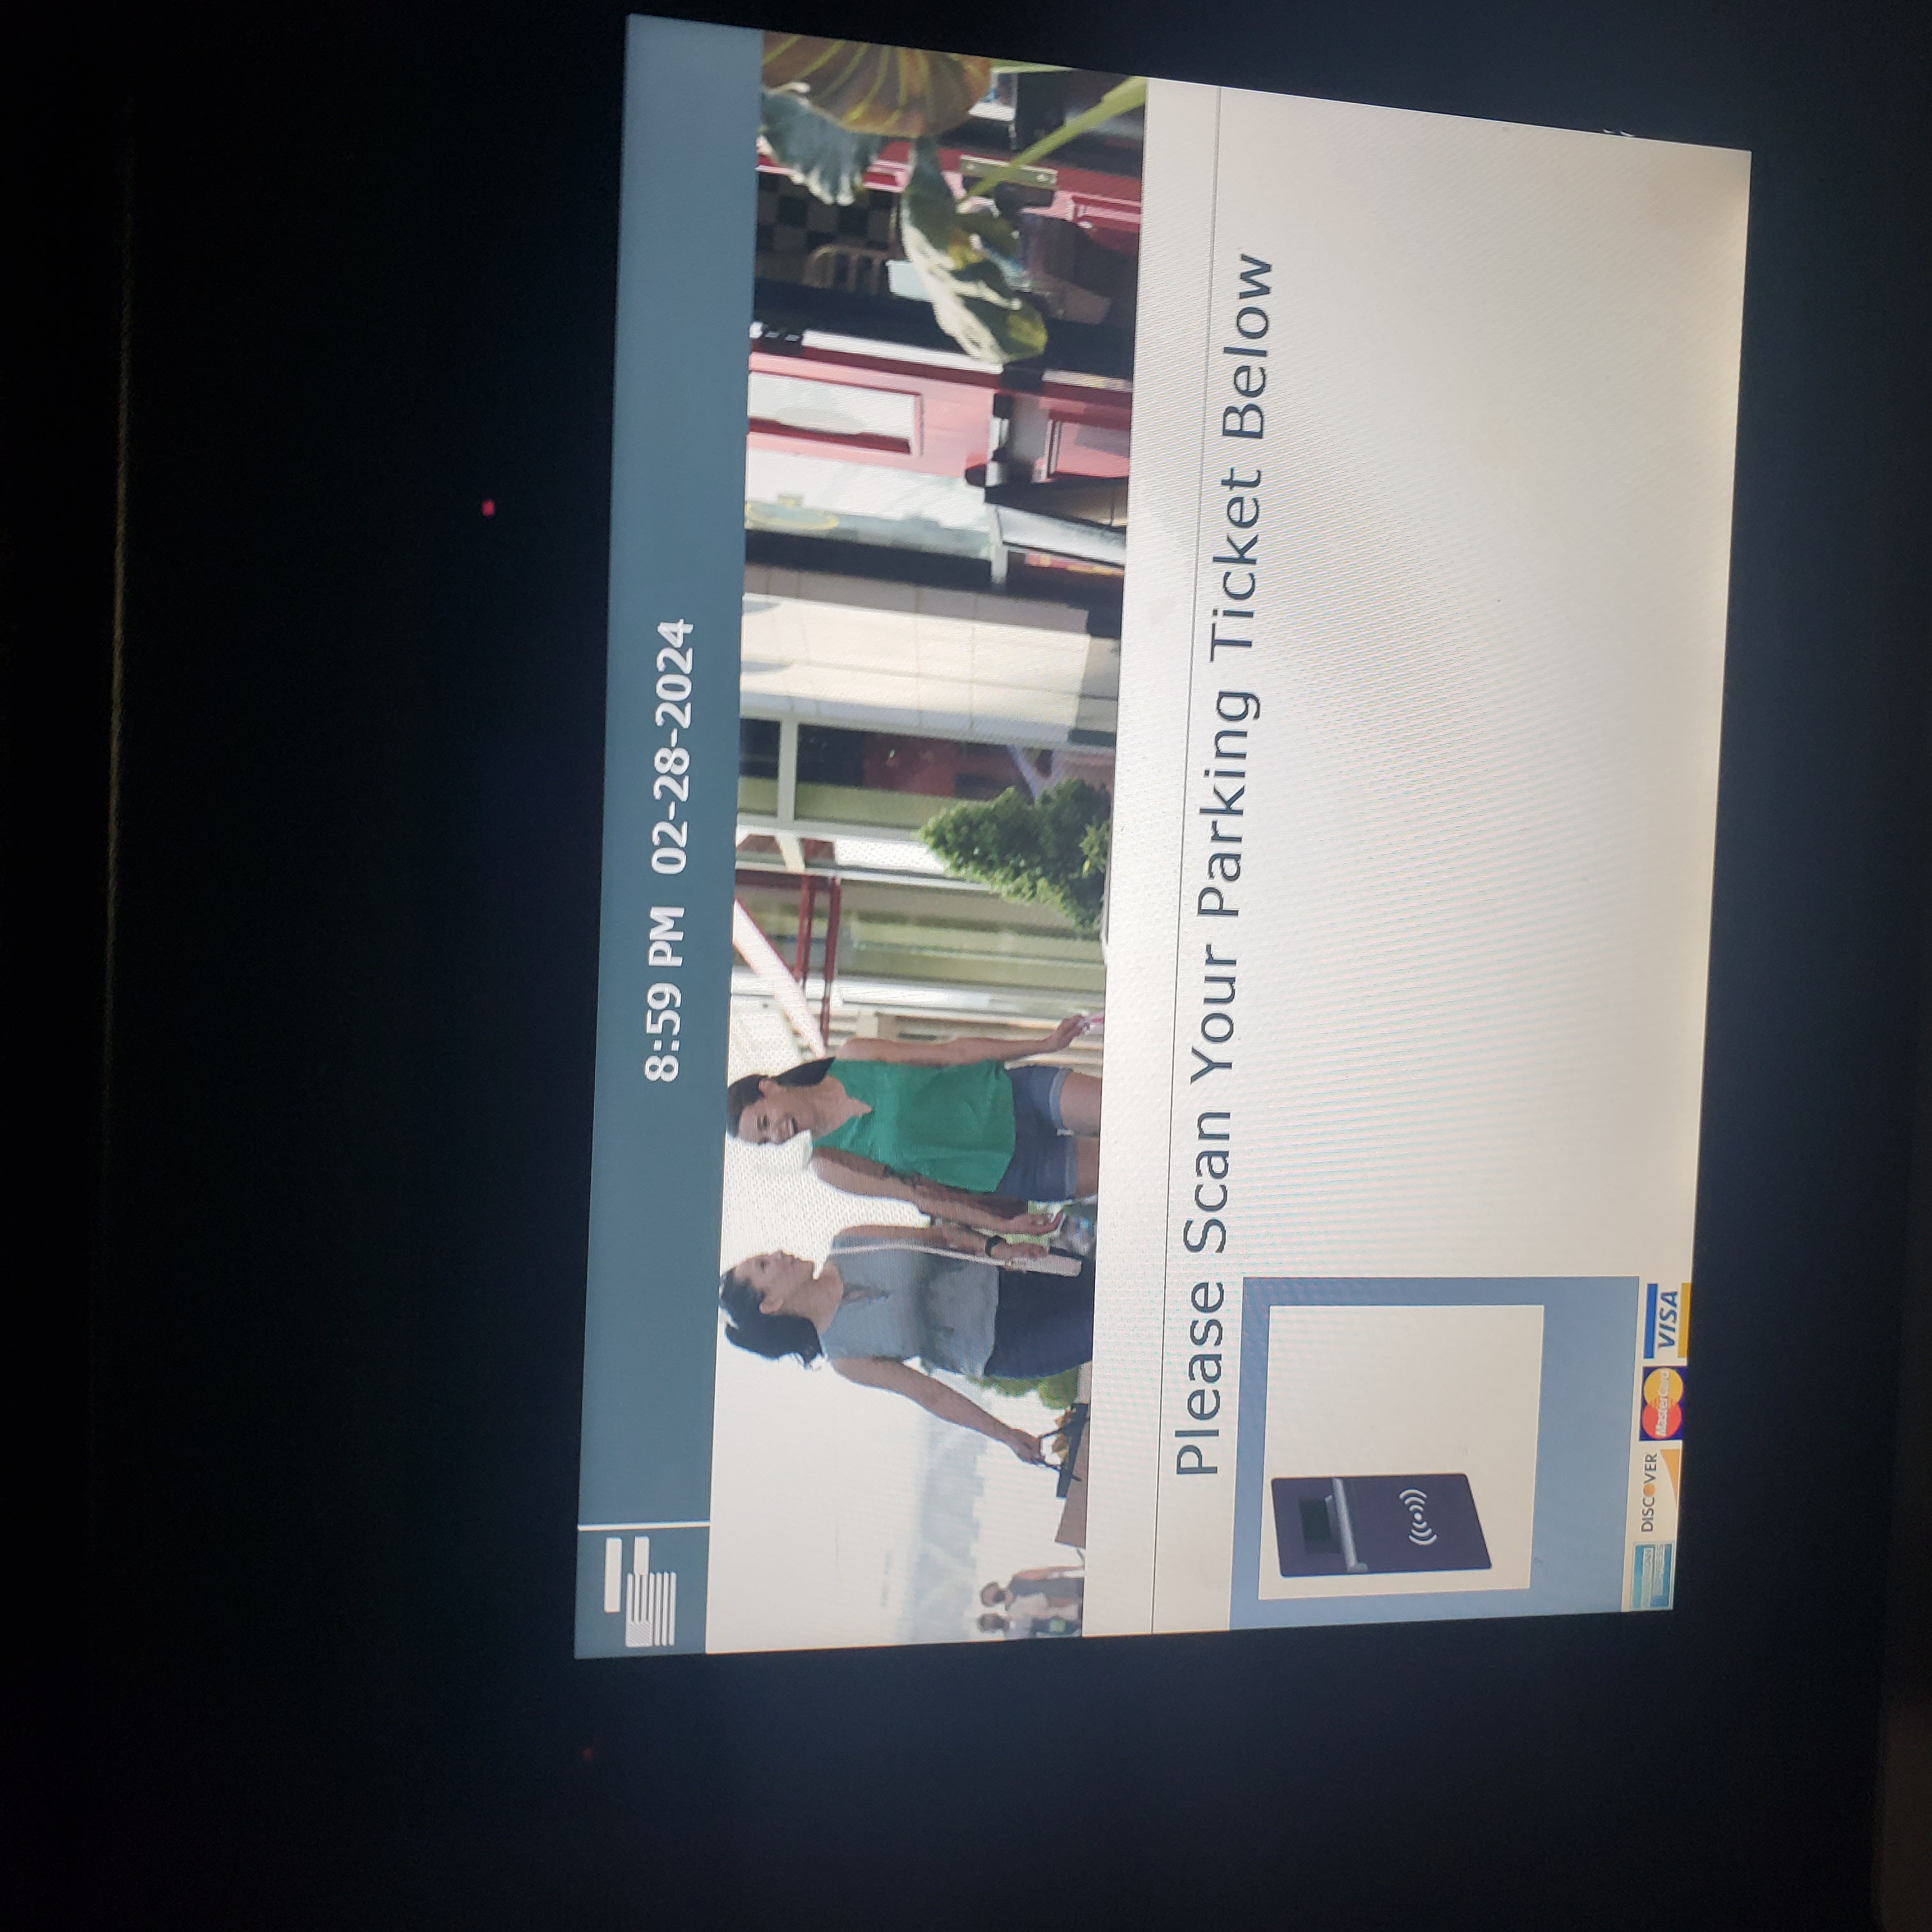
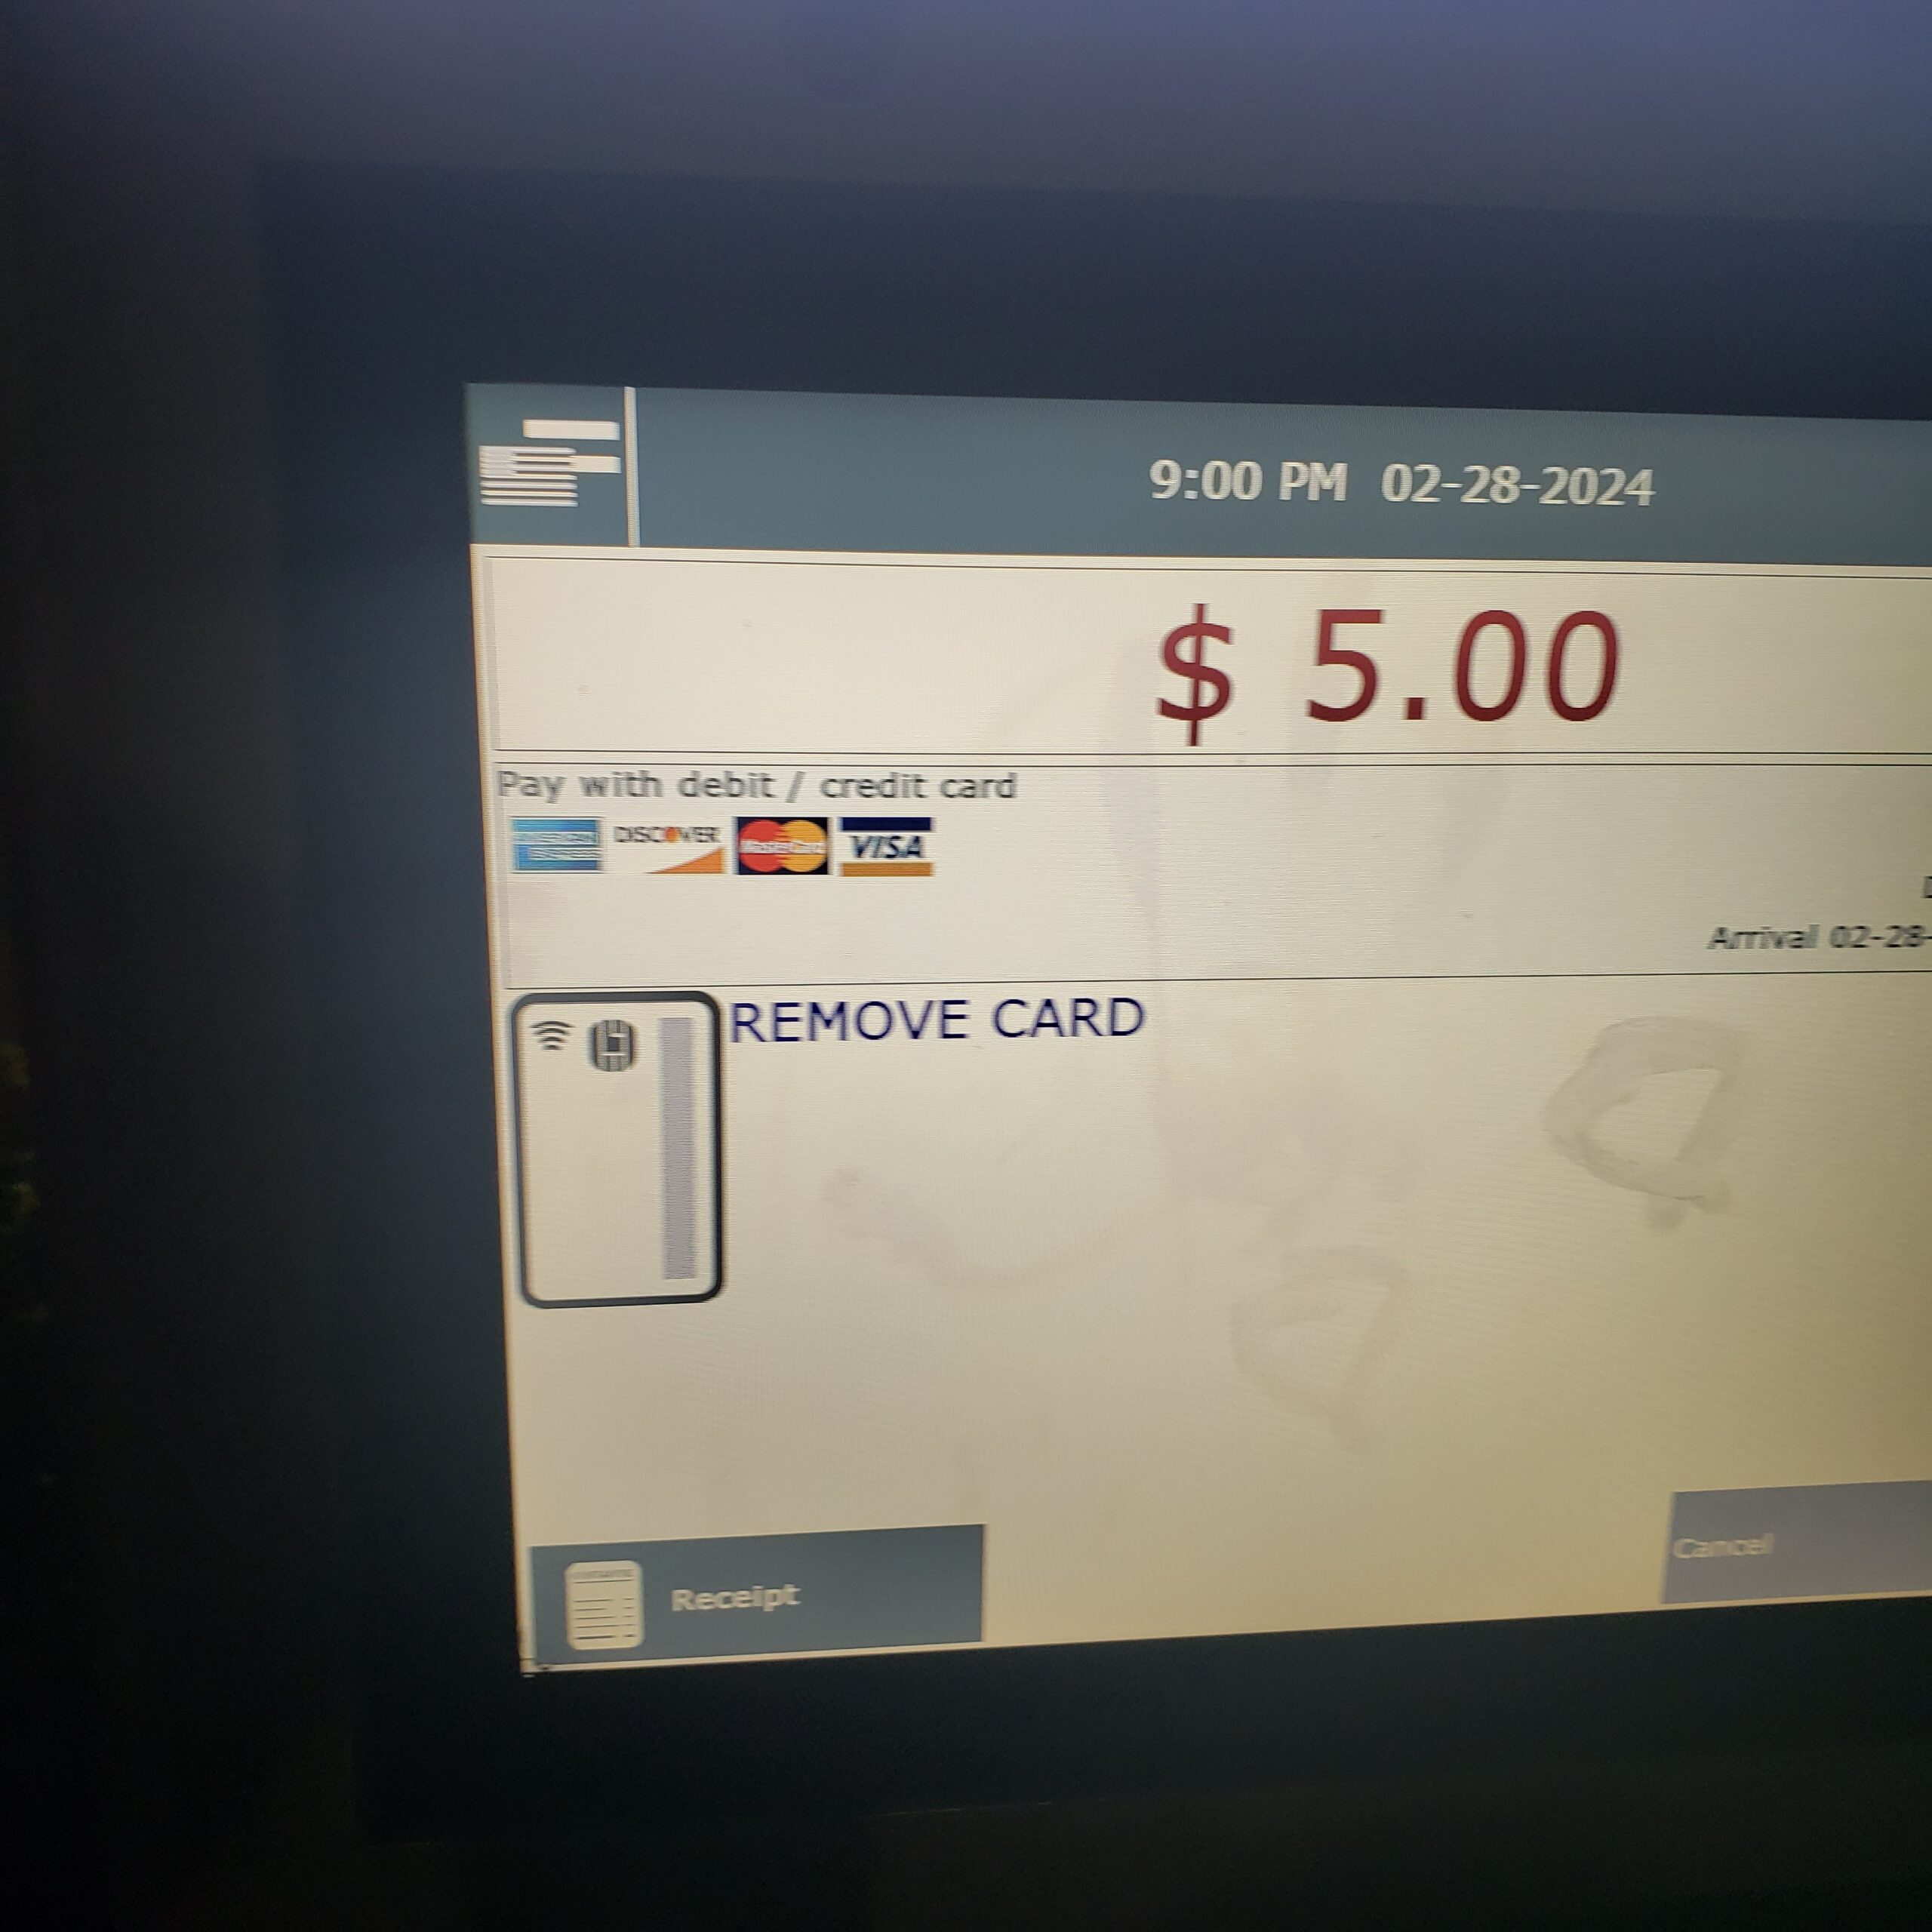
The point here?: When my daughter recently drove me and my family to dinner for my birthday celebration recently we (at least she was lol) were able to use the haptic parking lot equipment to mostly **uneventfully** to enter and leave the parking restaurant’s parking lot. See the two pictures above. Too often such haptic experiences are not smooth. I could cite relatable examples. This night, all was smooth and That the Way I Like It!
USEFUL, INSPIRING, OR CREATIVE USER INTERFACE EXAMPLE – # 3 “*Eventful* Parking UI – That’s the way I Don’t Like it – Aha Aha ”
CATEGORY: “USEFUL UI IMPROVEMENT— COULD BE BETTER —- WHAT CAN WE LEARN?”
DC street signs, like a lot of big city parking, directional, and safety signs can be puzzling to interpret for the “end user”! Such multiple “interfaces”, all crying out to you from the same spot convey different instructions often irritate drivers like yours truly.
Parking signs —- like the ones below —– are the bane of my existence!
Unlike their electronic UI cousins it not always easy to just abandon the situation, not make the purchase or receive the information —- and to simply leave!
Learning UI Moral of the Story?: Take your time to decode; read from top to bottom.
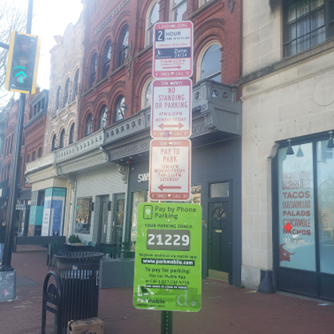
“A tall, hazy order”: I’m allowed to do what?”
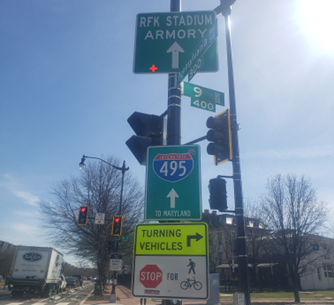
“3 seconds to interpret 5 signs before I have to make this right turn!”
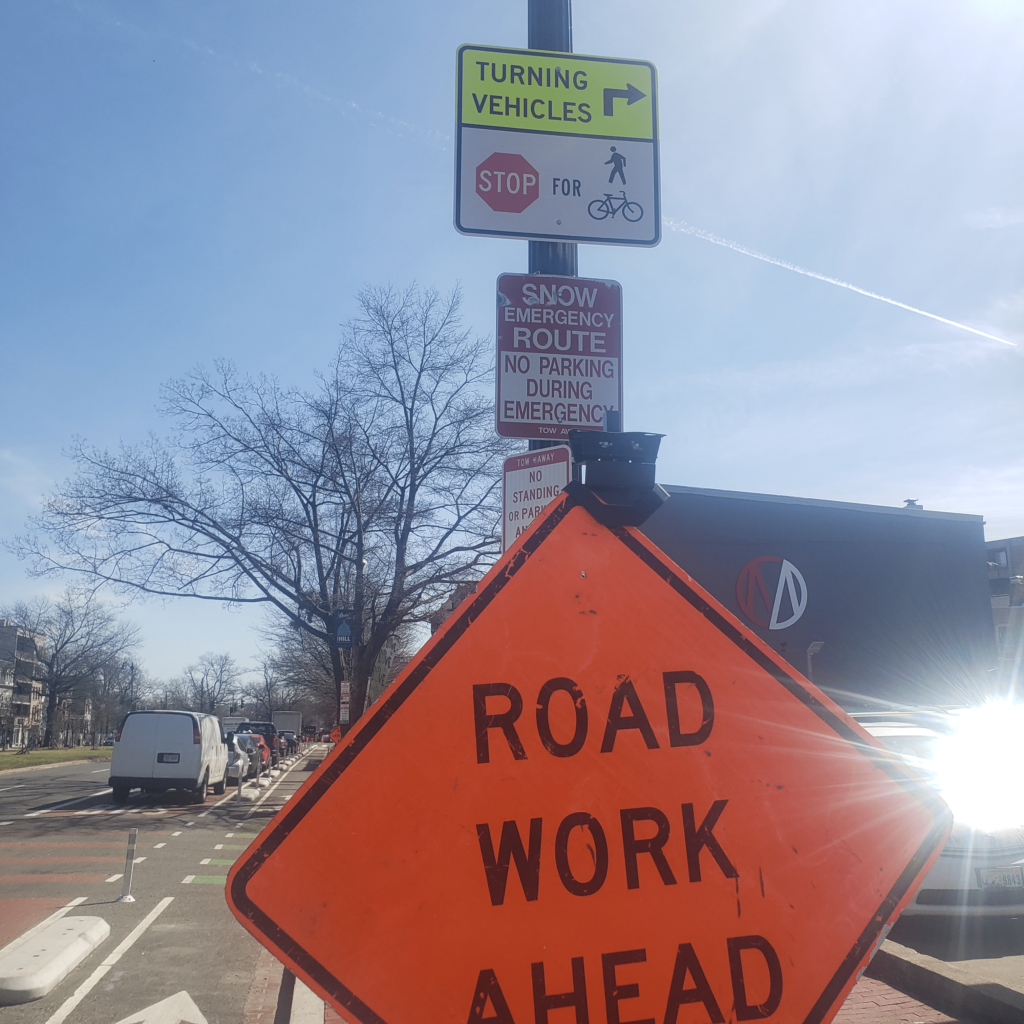
“No — 3 seconds to quickly interpret, not 5, but a total of **6** signs before I have to immediately make this right turn!!”
USEFUL, INSPIRING, OR CREATIVE USER INTERFACE EXAMPLE – # 4 “HP Smart” Printer Cell Phone App!”
CATEGORY: “VERY SOLID CELL PHONE UI/APP?”
I recently purchased a new HP printer and dang! . . . it allowed me to download a cool, potentially very useful companion cell phone app. See the cellphone picture below. Overall, I think the app and it’s UI will prove useful although I had to annotate it’s UI home screen (that I took a pic of on the box) via red mini arrow flags (see below).
Indeed I had to *supplement* my introduction to the UI in an old fashion, non-electronic way to home in on things that were immediately important to me!
Now judging from the printer’s instructions I think I will definitely like the haptic feedback that I will get regarding certain functions.
For example, vibration alerts when a print job has started or completed!
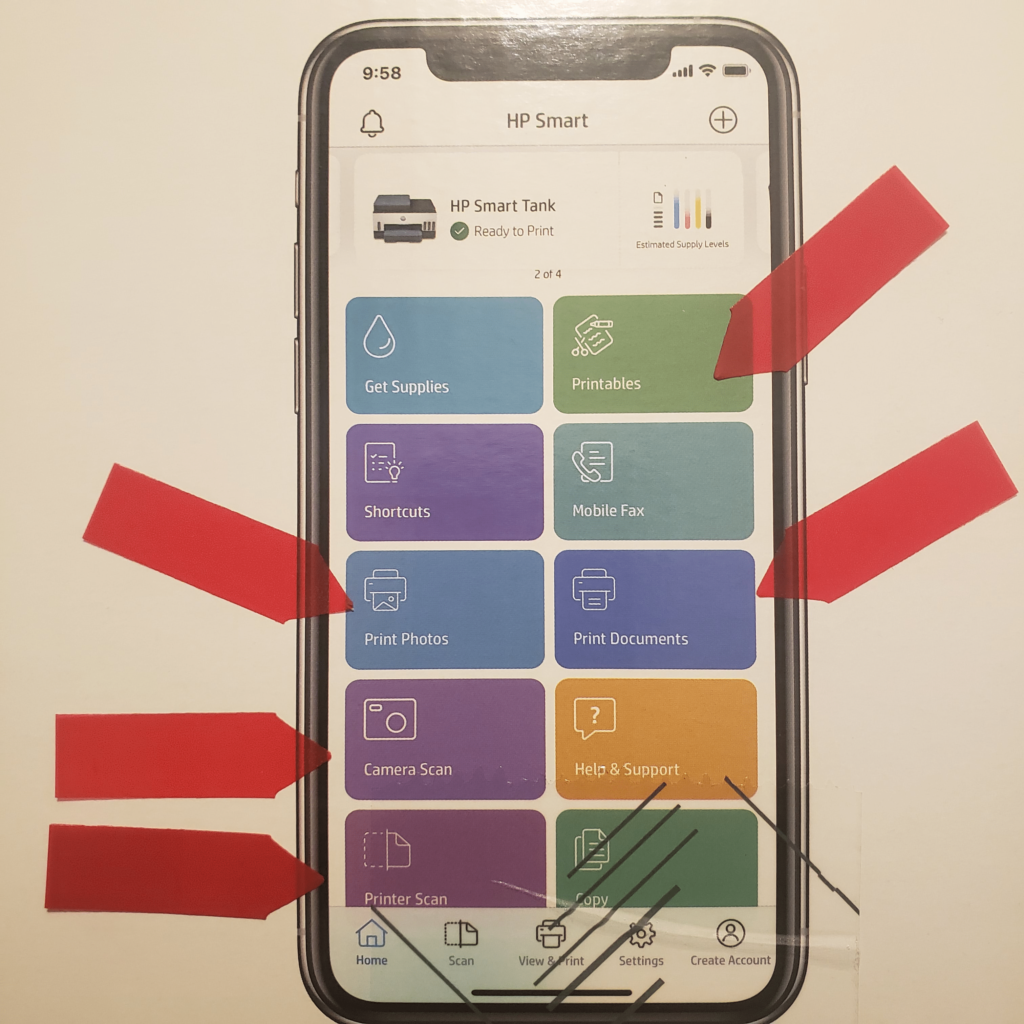
“Thanks for colorfully guiding my eyes to the “HP Smart” printer’s functions with an old school, deeper assist from me!”
USEFUL, INSPIRING, OR CREATIVE USER INTERFACE EXAMPLE – # 4 “Spotify Printer Cell Phone App!”
CATEGORY: “VERY SOLID CELL PHONE UI/APP
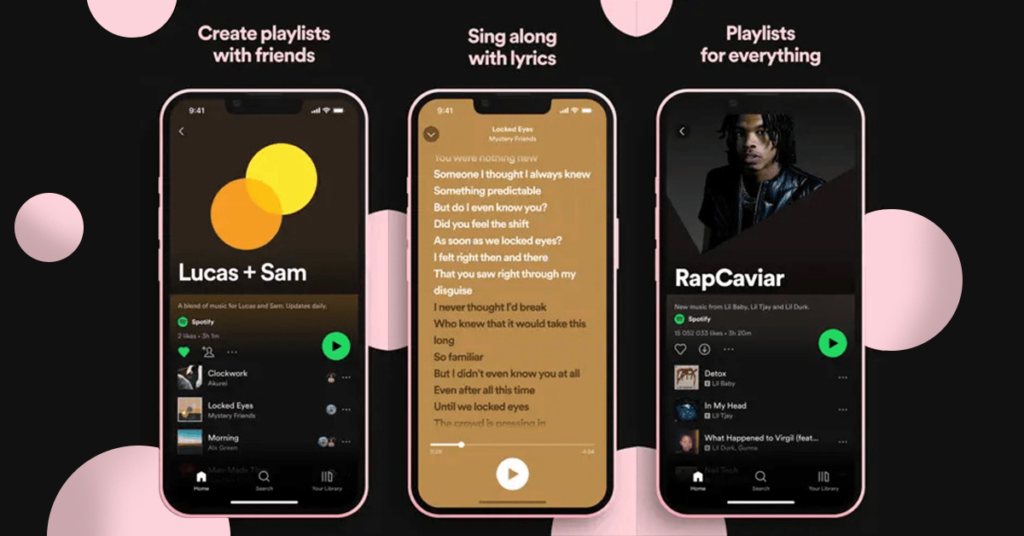
I actually occasionally use the Spotify cell phone app in my car. When this app organically came up on more than one site’s commendation for a good UI/UX example, I wanted to explore the app, shown below, further.
Other than more limited features and functionality than the desktop version of Spotify I have not had any problems with achieving my main goals of finding my playlist and preferred songs or preferred music genres to listen to or explore!
Judging by my main criteria suggested a couple of times earlier, an UI app or other such interaction is already a winner in my book if it does one, main thing ===> enhance my experience, allowing me to achieve my goal – *uneventfully* — without getting in the way!
As shown in the visual below, I like how it clearly and cleanly displays the current song or songs that can be played allowing me to *intuitively* and *seamlessly* manage my songs, music, and playlists.
This is what I would expect from such a paid, subscription app!
Spotify’s navigational scrolling, swiping, tapping, and song searching functionality is also pretty seamless, so I can see why it is an app noted for its strong incorporation of UI/UX principles!
USEFUL, INSPIRING, OR CREATIVE USER INTERFACE EXAMPLE – # 5 “PayPal Cell Phone & Web Functionality”
CATEGORY: “VERY SOLID CELL PHONE & WEB UI/APP?”
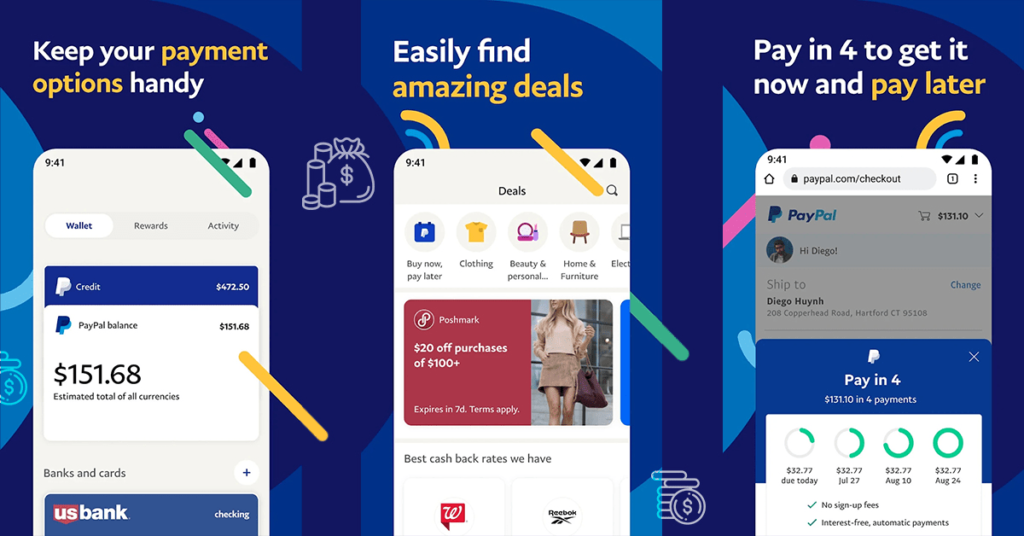
Like Spotify, I occasionally use the PayPal app, although never, so far, from my cell phone. Now if the PayPal ad below is any indication the UI/UX of the PayPal app it will be “easy” and “handy”.
At this point, however, I can only go by what my PayPal cell phone app research suggests, and my experience with the web version. In fairness to PayPal, because I only use the web version infrequently, I do recall, right of the bat, having to call PayPal’s customer service number to find particular functions or features.
PayPal’s Graphical User Interface (GUI) in and of itself, did not always do the trick!
In general as I downloaded and looked at both the cell and web versions of PayPal I notice that they are both clean and organized. In particular, they both use plenty of white space within the UI which, navigationally, is very helpful!
The straightforward dashboard also helps me to get a quick overview of my account including recent transactions and balances. I can therefore sort of see how PayPal’s acclaimed user-centric UI system has contributed to its success!
USEFUL, INSPIRING, OR CREATIVE USER INTERFACE EXAMPLE – # 6 “My Fit Bit Watch! ”
CATEGORY: “UI & WEARABLES ANYONE? –WATCHES, RINGS, AND OTHER SUCH THINGS!”
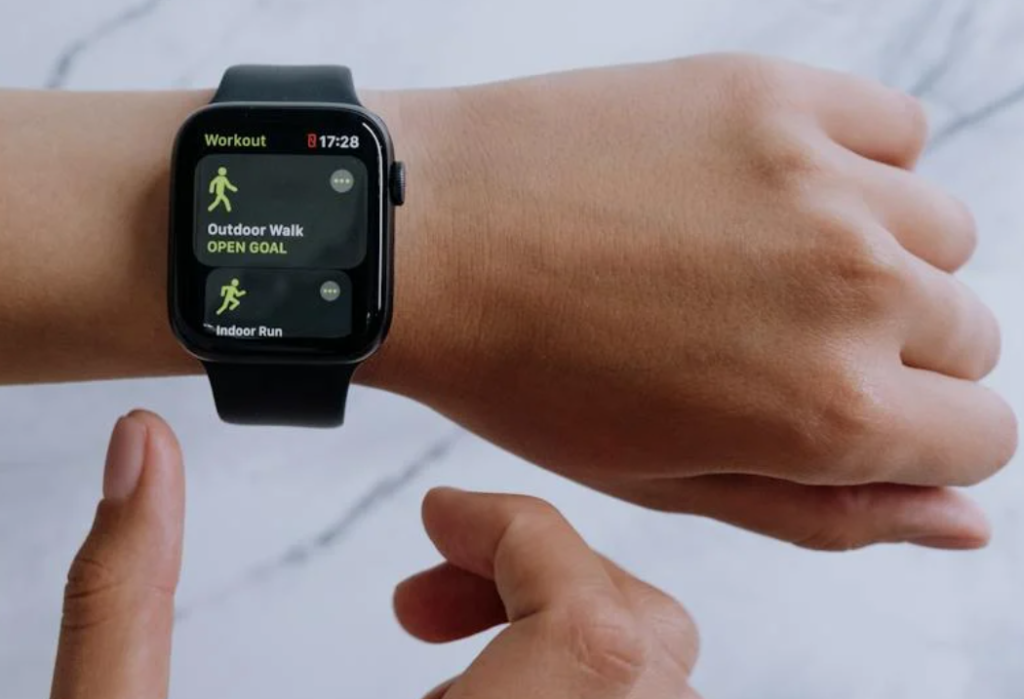
I have A Fit Bit watch like the one shown above that I chose and received as an achievement award at work. I only wear it during the warm spring and summer months when I occasionally go walking lol. As I recall its pretty user-friendly for the one feature that I use, really just number of steps per day.
Now, in general, I realize that its UI can probably facilitate more functionality than what I typically use it for such as displaying time, date, and heart rate, alarms, and various notifications but I’m sort of impatient if I can’t *consistently* get to certain things *when* and *how* I want.
You could say I have an inherent bias for some technology that a UI, particularly such a small one, is not going to easily overcome!
Ihave seen such wearables (e.g. the Apple Watch) be useful and effective for many, including those in my own family. I can appreciate, in particular, the vibration alerts, the integration with your cell phone, and folks speaking, Dick Tracey style into their watches!
Wearables have even been pushed down to being on people’s rings and, when the price comes down far enough, I might even be seen in the future sporting such a “smart ring” gem to track my steps or pay my bills —– lol!
CREATE
I was generally pleased with my final, looping User Interface animation. It was a challenging, but fun project and a key, again, was that I was fortunate, again to be able to start early.
I discovered that the Professor’s tutorials, along with You Tube, and even Udemy etc. were my friend. I know that the animation still needs work, including me working on shorting the time it takes for some the pages to flip.
Below are some details on how I accomplished my animated UI design:
I first downloaded assets from the internet, including a phone with a transparent inside, a generic phone wallpaper, my company’s Pepco logo, and the T & S (my department’s) welcome letter. I then opened up After Effects and created a white Solid Layer.
I then added Lumetri Color in the Effects & Presets panel so that I could add a vignette. After I made the white solid layer 3D, I made the third number (the z position) in the position settings of it 2000 so that it was all the way back. I also added a camera layer to activate the 3D.
After adding the phone png and making it 3D, I combined it with a black shape layer into a pre-comp, making it easier to move and flip out towards the viewer. I then moved the position keyframes of the camera to slide the phone over and bring out the Pepco logo next to it.
Using the trim paths effect, I drew out two lines that point to the phone from the Pepco logo. This is where, in the pre-comp of the phone, I turned the opacity from 0% to 100% of the generic phone wallpaper. I then created a white rounded rectangle in our main composition, added the Pepco logo on top of it, and then quickly made the white rounded rectangle grey to give the effect of someone pressing the icon.
Everything on the screen immediately after this was faded on using the opacity keyframes from 0% to 100%. The UI toggle button was made as a combination of three shape layers – two rounded rectangles (one purple, one blue) and a circle. Using a mask and creating mask path keyframes, I made the illusion that the button was being toggled by having the mask path keyframes follow the circle’s position from right to left.
The loading bar right after this is made of two shape layers — both rectangles. The same idea was used here, creating a mask path and keyframing it to show the illusion of loading.
The main menu that appears after this is actually a series of 4 pre-comps. First, I made the T & S Welcome Letter pre-comp. It is a yellow shape layer in the shape of a square that has had turbulent displace applied to it from the Effects & Presets tab. The only keyframes on this are the position keyframes, which move the shape from out of left frame to into the viewing space.
The text has an effect from the Effects & Presets panel to fade on character by character. From here, we duplicated this pre-comp 3 times, changed the colors of the background, changed the text, and scaled them down when I put them into the main composition to give the appearance of 4 different menu buttons.
For that first button tap on the T & S Welcome Letter, I darkened the colors to try to give the appearance that the button was being tapped. I used opacity keyframes to transition the UI into the Microsoft Word icon, which had scale keyframes attached to give the “bouncy” effect (scale keyframes from 0 to 7.5 to 5).
Then, everything else fades in with opacity keyframes. For the book pages, CC Page Turn was used from the Effects & Presets panel, with keyframes to tell the pages which way to go/how fast to flip.
The rest of the animation re-uses some of these same techniques, until it finally fades back into that white solid with the vignette — looping the animation!
Have a look!
Below is a looping GIF of the video above. I think it is useful in seeing the “motion across media” —— how the animation plays out in another medium and for examining the piece in that particular medium without music and sound as Liz Blazer recommends. This way I have two mediums, mp4 and Gif, to better judge if the animation holds up on its own merits —– What do you think?

